An application form says "attach one ID photo" and stops there. The photo studio asks which format you want. The online upload screen suddenly abandons millimetres altogether and demands 413×531 pixels under 200KB. The format name, the physical size, and the pixel count live in three separate worlds, and you can easily have a perfectly good photo on your desktop while still being unable to decide what to submit.
This guide pulls those three worlds into one table. First we map which documents ask for which format, then we pin down the exact millimetre dimensions of each format, and finally we convert those dimensions into pixels at 72, 150, and 300 DPI in a single cross-reference chart. The goal is to get you out of the state where you know the name but not the numbers.
1. Which Document Wants Which Format
Format selection always starts with the document, never with the photo. You confirm what the receiving office requires, then build a file to that spec. Here is how the common formats are typically distributed.
| Document / use | Usual format | Actual size (mm) | Notes |
|---|---|---|---|
| Resume, paper job application | Small ID (banmyeongham) | 30×40 | The default ID photo in Korea |
| Student card, staff badge, application forms | Small ID | 30×40 | Small paste-on photo |
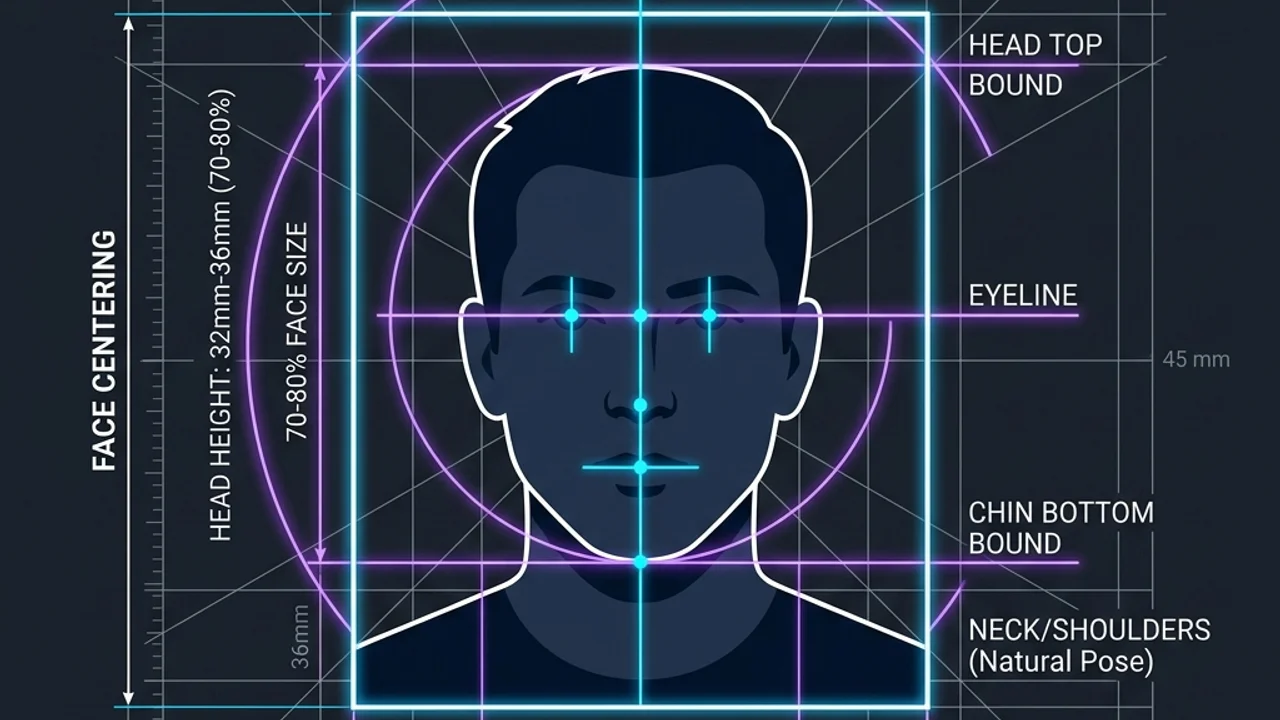
| Passport (new or renewal) | Passport format | 35×45 | Comes with a 32–36mm head-height rule |
| National ID card, driver's licence | Same as passport format | 35×45 | Separate background and expression rules |
| Certification and licence applications | Varies by issuing body | 30×40 or 35×45 | Always check the notice |
| Online application upload | Pixels and file size instead of a format | — | e.g. 413×531px, under 200KB |
| Framed or keepsake prints | Card / large card | 50×70, 65×90 | Print sizes, not ID sizes |
| US visa | 2×2 inch square | 50.8×50.8 | Paired with a 600×600px rule |
This table describes prevailing convention. The final authority is always the notice published by the office receiving your document. Certification and licence bodies in particular mix 30×40mm and 35×45mm between different exams under the same organisation, so assuming "it is an ID photo, therefore 30×40" gets applications rejected at intake. If the notice gives you only a format name, take the dimensions from section 2. If it gives you only a pixel count, work backwards using the chart in section 3.
Passport photos add a second layer of rules on top of the format, because the proportion of the frame the face occupies is also regulated. That side of the problem is covered separately in how to resize a passport photo online.
2. The Four Formats and Why the Names Mislead
Format names are conventions, not arithmetic. Trying to infer a size from a name will fail every time.
- The small ID format is 30×40mm. In Korea this is what "ID photo" means by default.
- The passport format is 35×45mm. National ID cards and driver's licences use the same dimensions, which is why it is sometimes called the identity-card format.
- The card format is 50×70mm. An actual business card is usually 90×50mm, an entirely different shape, so picturing a business card sends you off in the wrong orientation.
- The large card format is 65×90mm. It is a print and keepsake size rather than a document size.
The first trap is right there: the small ID format is not literally half the card format. Half of 50×70mm would be 25×70mm or 50×35mm, not 30×40mm. The names indicate a rough size ranking and nothing more, so never derive one format from another by arithmetic. Use the numbers in the table as they are.
The second trap is aspect ratio. Every format sits at a slightly different proportion.
| Format | Size (mm) | Ratio | As a decimal |
|---|---|---|---|
| Small ID | 30×40 | 3:4 | 0.750 |
| Passport | 35×45 | 7:9 | 0.778 |
| Card | 50×70 | 5:7 | 0.714 |
| Large card | 65×90 | 13:18 | 0.722 |
| 2×2 inch (visa) | 50.8×50.8 | 1:1 | 1.000 |
Different ratios mean you cannot convert between formats by scaling alone. The small ID format at 0.750 and the passport format at 0.778 look nearly identical to the eye, yet at a height of 40mm the widths differ by roughly 1.1mm. Ignore that and stretch the image to fit, and the face spreads sideways. Keep the ratio and scale instead, and the edges get cut off. Changing format always means re-cropping from the original, never stretching an existing crop.
3. The mm-to-Pixel Formula and a DPI Cross-Reference Chart
A digital file has no millimetres in it. All it has is a pixel count, and how many millimetres those pixels cover on paper is decided by the print density, DPI. That is why the same 30×40mm frame demands completely different pixel counts depending on DPI, and why searching for "ID photo size in pixels" never returns one clean answer.
There is only one formula.
pixels = millimetres ÷ 25.4 × DPI
One inch is 25.4mm, so you convert millimetres to inches and multiply by dots per inch. Applying that to all five formats gives the chart below, rounded to whole pixels.
| Format | Size (mm) | 72 DPI (screen) | 150 DPI (quick print) | 300 DPI (photo print) |
|---|---|---|---|---|
| Small ID | 30×40 | 85×113 | 177×236 | 354×472 |
| Passport | 35×45 | 99×128 | 207×266 | 413×531 |
| Card | 50×70 | 142×198 | 295×413 | 591×827 |
| Large card | 65×90 | 184×255 | 384×531 | 768×1063 |
| 2×2 inch (visa) | 50.8×50.8 | 144×144 | 300×300 | 600×600 |
The single most useful row is the passport format at 300 DPI, 413×531. That is exactly where the pixel requirement on passport and identity-card upload screens comes from. Read it in reverse and a demand for 413×531 tells you the office wants 35×45mm printed at 300 DPI, which means the same source file can also produce your printed copies.
The chart also shows why reverse-engineering a format from a pixel count alone is risky. The number 413 appears twice. It is the width of the passport format at 300 DPI, and it is the height of the card format at 150 DPI. The same pixel value emerges from two completely different combinations of size and density, so hearing "413" and concluding "that must be passport size" can send you to the wrong format entirely. A pixel value only means something when paired with a DPI.
Choosing the DPI is a matter of purpose. Anything destined for a physical print is effectively standardised at 300 DPI. 150 DPI is the level of a quick home-printer copy, and 72 DPI is screen preview quality that will show visible pixels once printed. Setting a low DPI for a submission photo keeps the file small but collapses the quality the moment it is printed.
If you move between millimetres and pixels often, feed the dimensions and target DPI into the pixel converter instead of doing the arithmetic by hand. Non-standard sizes that an office invented for its own form resolve through the same formula.
4. Online Submission and Printed Submission Are Judged Differently
The same photograph is checked against different criteria depending on where it goes. Miss that distinction and you can build something flawless for one channel and have it rejected by the other.
| Channel | What gets specified | Where it commonly fails |
|---|---|---|
| Online upload | Pixels, file size in KB, format (usually JPG) | Correct pixels but oversized file, or a rejected PNG |
| Printed submission | Millimetres, DPI, layout on photo paper | Too few pixels, so the print comes out soft |
| Identity documents generally | Background colour, face proportion, recency of the shot | Correct size but rejected on background or expression |
When an online upload hits a file-size limit, shrinking the pixel count is the wrong first move. Hold the required pixels fixed and adjust JPG compression instead. Reducing pixels to meet a size limit puts you below the stated spec, while over-compressing produces visible blocking across the face. The quality settings that balance the two are laid out in the image compression guide.
Printed submissions have the opposite concern: do you have enough pixels? Printing 30×40mm at 300 DPI requires at least 354×472px, but a photo forwarded through a messaging app has usually already been downscaled to something in the low 200s. Enlarging that file to 354×472 does not invent detail that was never captured. The only real fix is to get the original back.
5. From Confirming the Format to Saving the File, in Five Steps
Here is the practical sequence, with the point at which each step usually stalls.
- Find either the format name or the pixel requirement in the notice. If neither is stated, asking the receiving office is faster than guessing. With a name only, fill in the dimensions from section 2. With pixels only, work backwards from the chart in section 3.
- Decide the DPI for your purpose. 300 DPI for printing and formal submission, 72 DPI for screen checking. This choice determines every pixel value that follows.
- Calculate the target pixels with the formula: divide millimetres by 25.4 and multiply by DPI. Do width and height separately so you end up with two concrete numbers.
- Crop the original to the target ratio. This is the step that matters most. Cropping rather than stretching is what keeps the face undistorted. Check that the face sits centrally and that the headroom above it is neither cramped nor excessive.
- Resize the cropped image to the target pixel dimensions, and if there is a file-size cap, adjust JPG quality when saving. Verify the actual file size and pixel dimensions once more afterwards.
Steps 4 and 5 normally call for an editing program, but for a fixed-spec job like an ID photo it is quicker to finish in the browser. Cropping and background handling are handled by the passport and ID photo tool, and scaling precisely to a target pixel count is what the image resize tool is for.
6. Five Mistakes That Keep Recurring
The traps above, restated as the errors people actually make.
First, stretching between formats with different ratios. Scale a 30×40 file up to passport pixel dimensions and the numbers will match while the face spreads slightly. Even if a reviewer does not catch it, the print looks subtly wrong.
Second, enlarging a small file to reach the required size. Blowing 200×260px up to 413×531px leaves the information content unchanged, so the print is soft. A pixel requirement is a minimum, not a guarantee of quality.
Third, editing only the DPI metadata. Changing the resolution field from 72 to 300 in an editor while leaving the pixel count untouched changes nothing about the actual image. DPI is a printing instruction written into the file; the pixel count is where the information lives. Most cases of "I saved it at 300 DPI and it is still blurry" come from exactly this.
Fourth, cutting pixels to meet a file-size limit. Keep the required pixels fixed and use compression to reach the size. Reversing the order puts you under spec.
Fifth, matching the format but never checking the face proportion. Passport and identity documents regulate how much of the frame the head occupies. A 35×45mm photo needs a head height of 32–36mm, so scaling down a shot framed at the waist gives you a correctly sized photo that still gets rejected.
7. Frequently Asked Questions
Q1. Which is larger, the small ID format or the card format?
The card format, by a wide margin. The small ID format is 30×40mm and the card format is 50×70mm, roughly 2.9 times the area. The name suggests one is half the other, but that is not arithmetically true. The everyday ID photo attached to a resume or an application form is almost always 30×40mm.
Q2. If someone asks for my ID photo size in pixels, what do I say?
You need the DPI before you can answer. A 30×40mm photo is 354×472px at 300 DPI, 177×236px at 150 DPI, and 85×113px at 72 DPI. If the person asking handles online applications, they almost certainly mean 300 DPI, so 354×472px is the right answer. For passport and identity documents it is 413×531px.
Q3. Can I reuse a passport photo file as a 30×40mm resume photo?
You can reuse the source, but not by simply scaling it down. 35×45mm and 30×40mm have different ratios, so scaling proportionally leaves excess on the sides and forcing the fit squashes the face. The correct sequence is to re-crop from the original at a 30:40 ratio and then resize to 354×472px. Background colour and recency rules still differ between documents, so check those separately.
Q4. How do I tell whether a file from a photo studio is really 300 DPI?
You can read the resolution field in the file properties or an editor's info panel, but counting pixels is more reliable. If it is at least 354px wide for the small ID format, or at least 413px wide for the passport format, it will print fine at 300 DPI. Even a file tagged as 72 DPI is usable if the pixel count is sufficient, because print density can be reassigned at print time. Judge by pixels, not by the tag.
8. Settling the Format and Building the File with Tools
Everything above reduces to three decisions: which format you owe, how many pixels that format is, and how to produce a file at those pixels. The first two come from the tables in this article. The third can be finished in your browser.
Put the format's millimetre dimensions and your target DPI into the pixel converter and you get the exact width and height you need to submit, including for non-standard sizes an office has invented. With those numbers in hand, use the passport and ID photo tool to crop the original to that ratio and position the face, then enter the same pixel values in the image resize tool and save. That file is your submission. All three tools run inside the browser, so the photo itself never leaves your device.
If an upload size cap is also in play, the image compression guide covers the quality settings that reduce file size while keeping the pixel dimensions intact.